Introduction:
When you are PenTesting an iOS application, you would want to read the code of the provided application and understand the backend classes and hidden information. Using this, you can try and exploit the application to gain access to sensitive information or to redirect the flow of the application in an malicious manner.
Reverse Engineering an
iOS application is completely different as compared to an Android
apk. The complete original source code cannot be revivied from an
existing iOS application. Only, declarations for the classes,
categories and protocols can be decompiled from an given application.
Requirements:
- iOS device must be jailbroken.
- OpenSSH should be installed on the
iOS device.
- SSH Client on your machine.
- "Class Dump" should be installed on the iOS device via "Cydia"
Detailed
Steps:
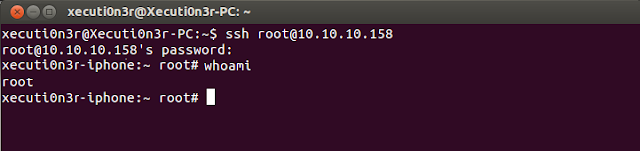
Step
1: SSH in to your iOS device using credentials as root:alpine.
Step
2: Launch the application on your device and note down the
application location on your device using the "ps -ax |
grep "App"" command.
As shown in the above
diagram, the application is running from location “
/Applications/Stocks.app/Stocks”
Step 3: Navigate to
that location “/Applications/Stocks.app/” via the shell.
We will use “Class
dump” to reverse engineer this application. It is a command-line
utility for examining the Objective-C runtime information stored in
Mach-O files. It generates declarations for the classes, categories
and protocols. We will do
this using the command
class-dump Stocks >
/tmp/dinesh/Stockreversed.txt
As
shown in the below screenshot, the application was decompiled
properly and the header and implementation files are copied to
location /tmp/dinesh/
in the file Stockreversed.txt
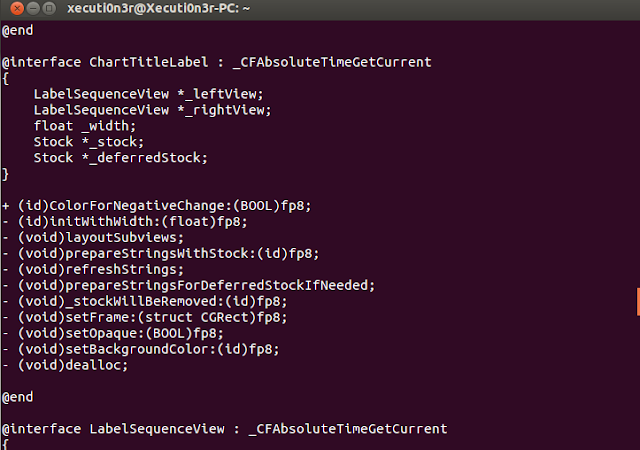
Below screenshot shows
the contents of the file “Stockreversed.txt” is clearly readable
and all kinds of hidden secrets and logical flaws can be understood
from here.
The above screenshot
shows that the source code is in cleartext and can be easily
analysed.
Now that you have the declarations of the classes and the protocols you can go ahead an debug the application using GDB or, hook on to the functions present in the application via MobileSubstrate and try to change its behavior.
However, many a times this process is not so straight forward and the developers put in additional security feature to prevent the attackers from reversing the applications by using debugging techniques. The ways by which, we can bypass this restrictions and try and dump the class declarations in an encrypted iOS application would be explained in the next blog post.
References: